Help center / For agencies / Step 5
Completing the project
1. Move project to ‘Complete’.
‘Projects’ > Click on project > Change status
or
Drag & drop project card on board view
❕ Once the project is complete, you can upload the final assets.
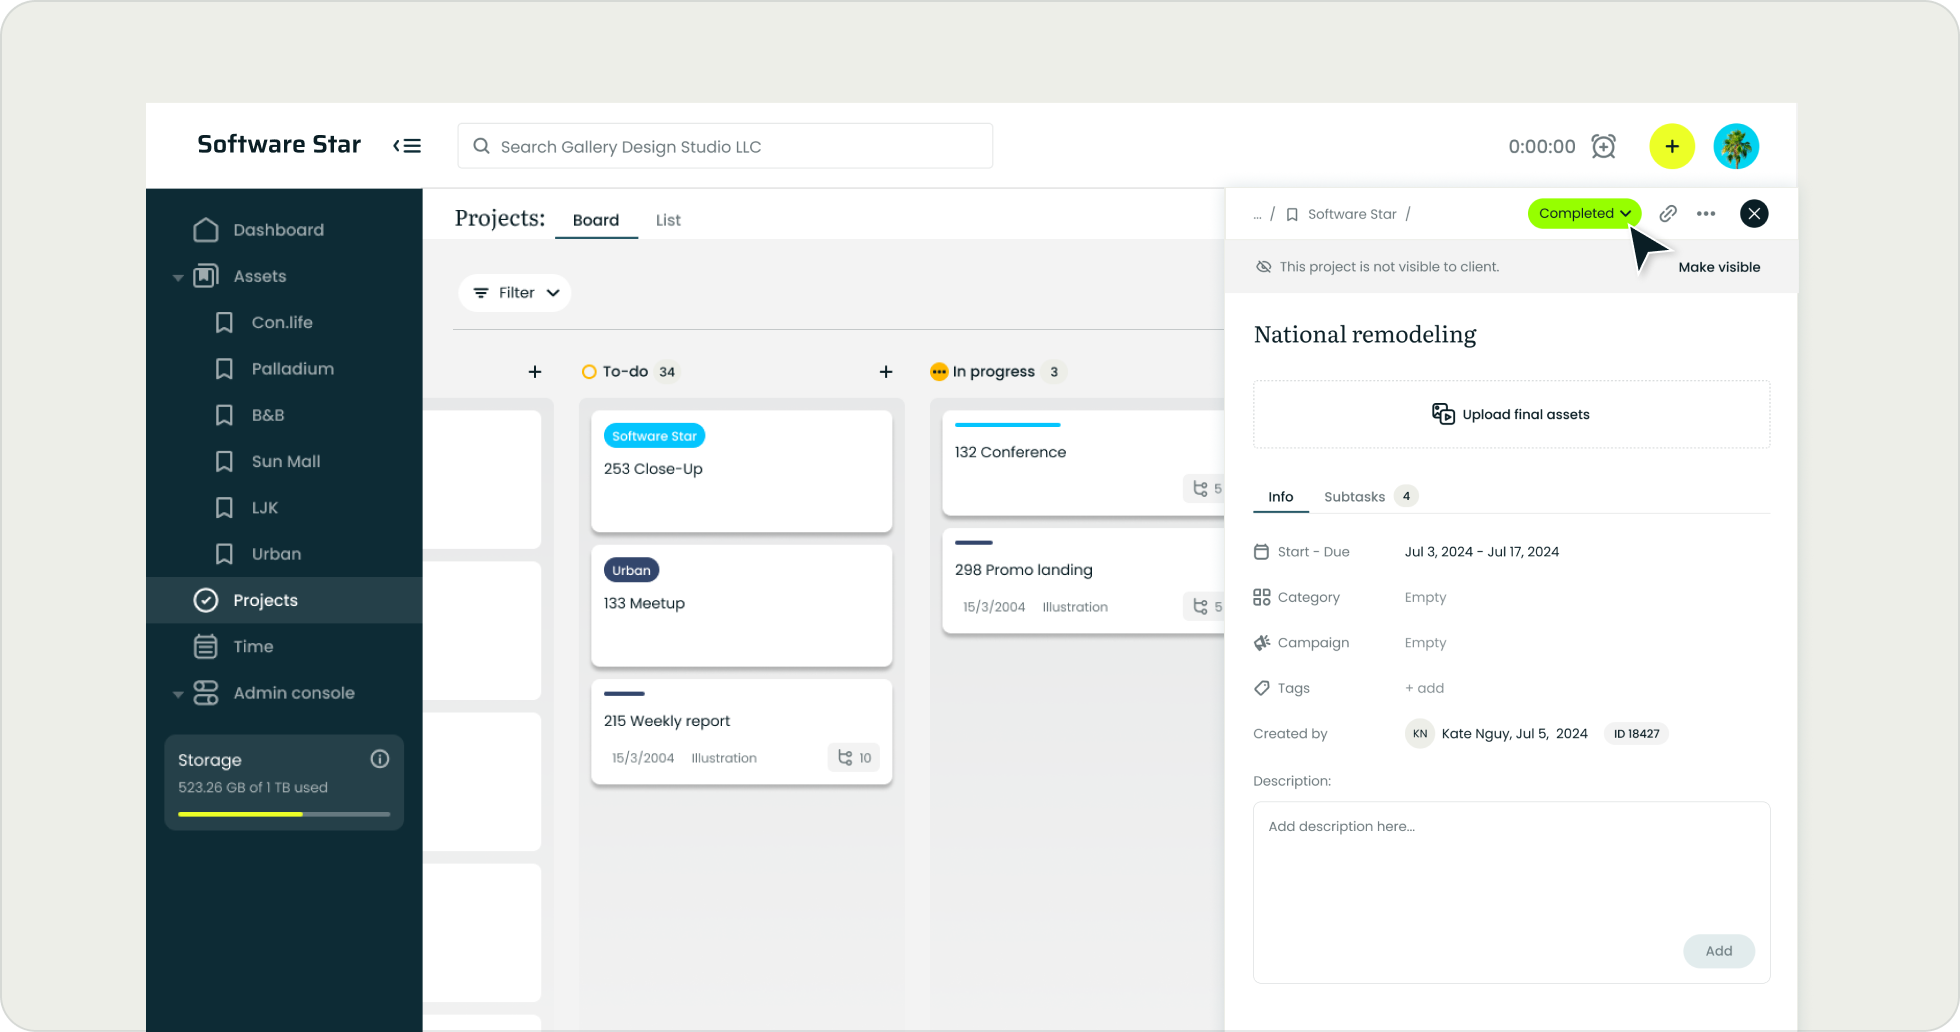
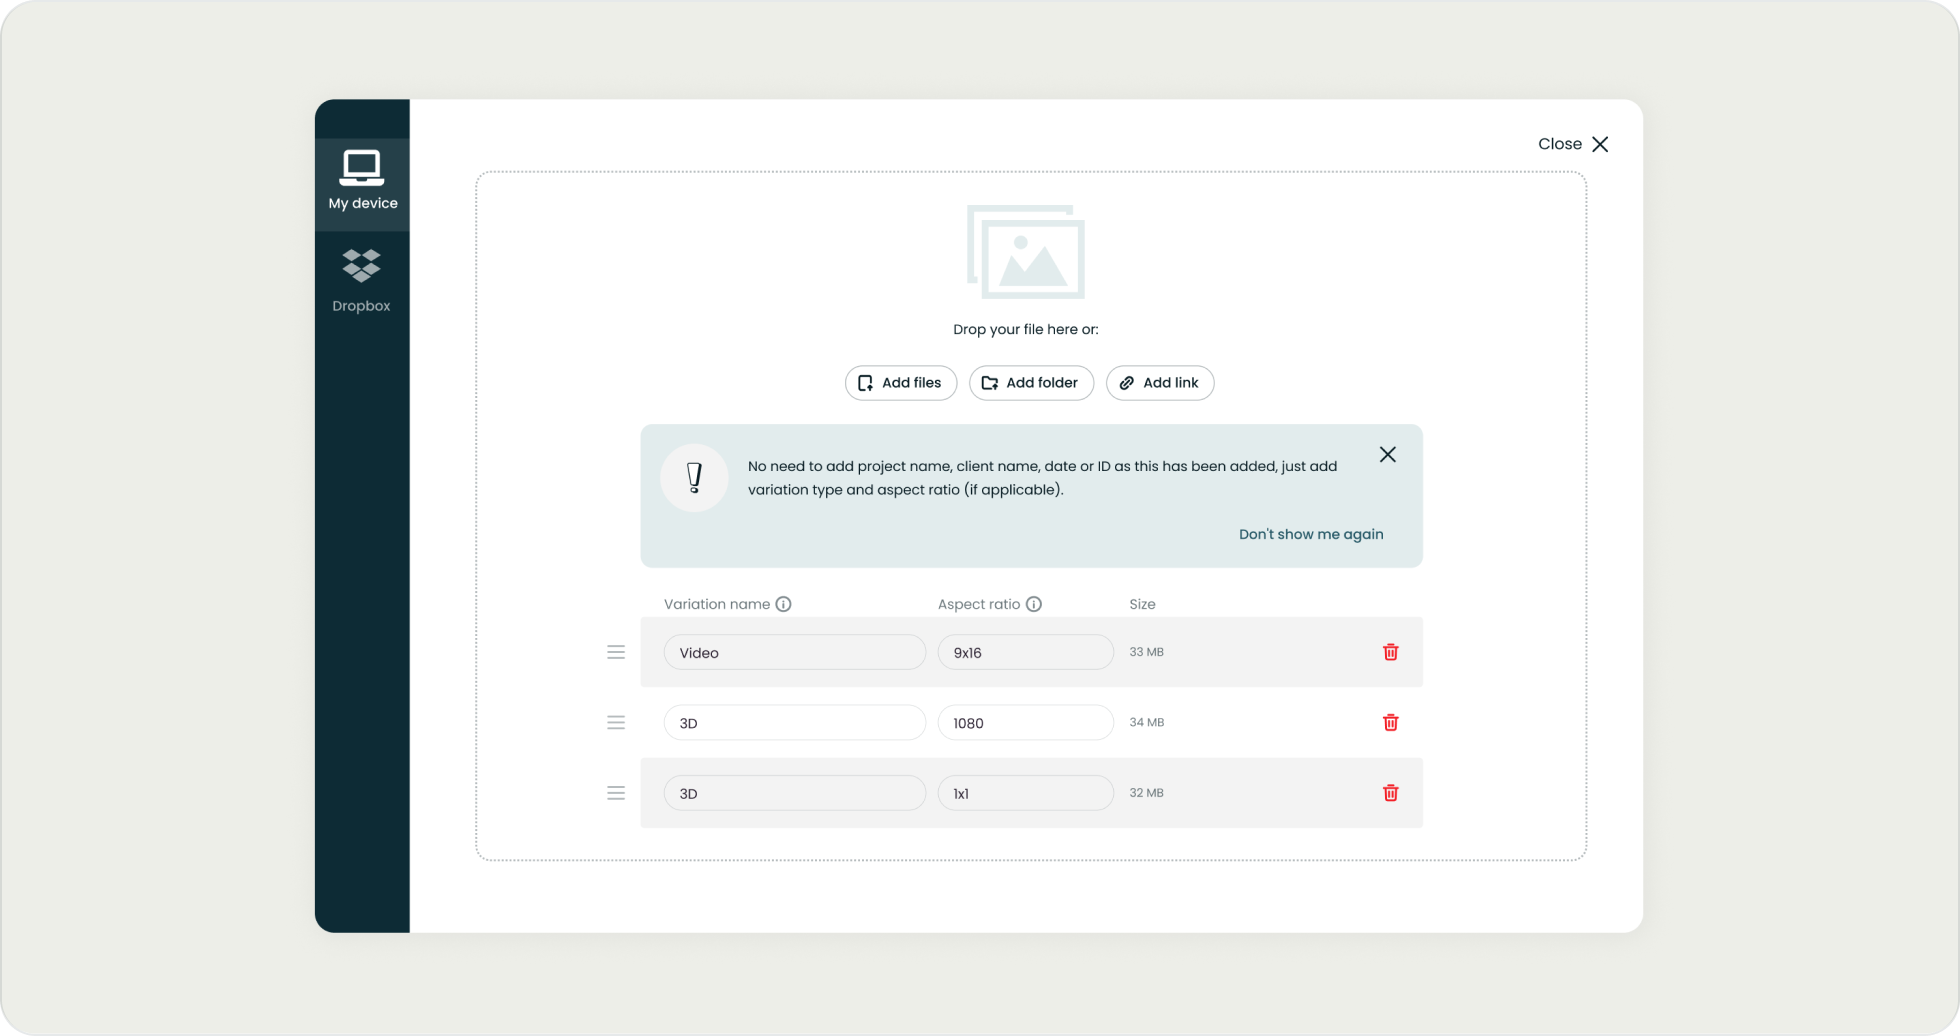
2. Upload final assets.
‘Upload final assets’ > Drag & drop or upload files
When uploading files, please adhere to the naming convention. Enter the variation name in the designated input field and include the aspect ratio if necessary. The client's name, ID number, and date will be added automatically.
eShelf supported file format include:
- Image file formats (.jpg, .png, .eps, .svg, .gif, .tiff)
- Video file formats (.mp4, .mov)
- Audio file formats (.mp3, .wav)
- Text file formats (.doc, .docx)
- Design program file formats (.ae, .aep, .ai, .indd, .psd, .xd)
- Compressed/Archive File Formats (.zip)
- Other formats (folder, link, .pdf, .ppt, .pptm, .pptx, .json, .tff)
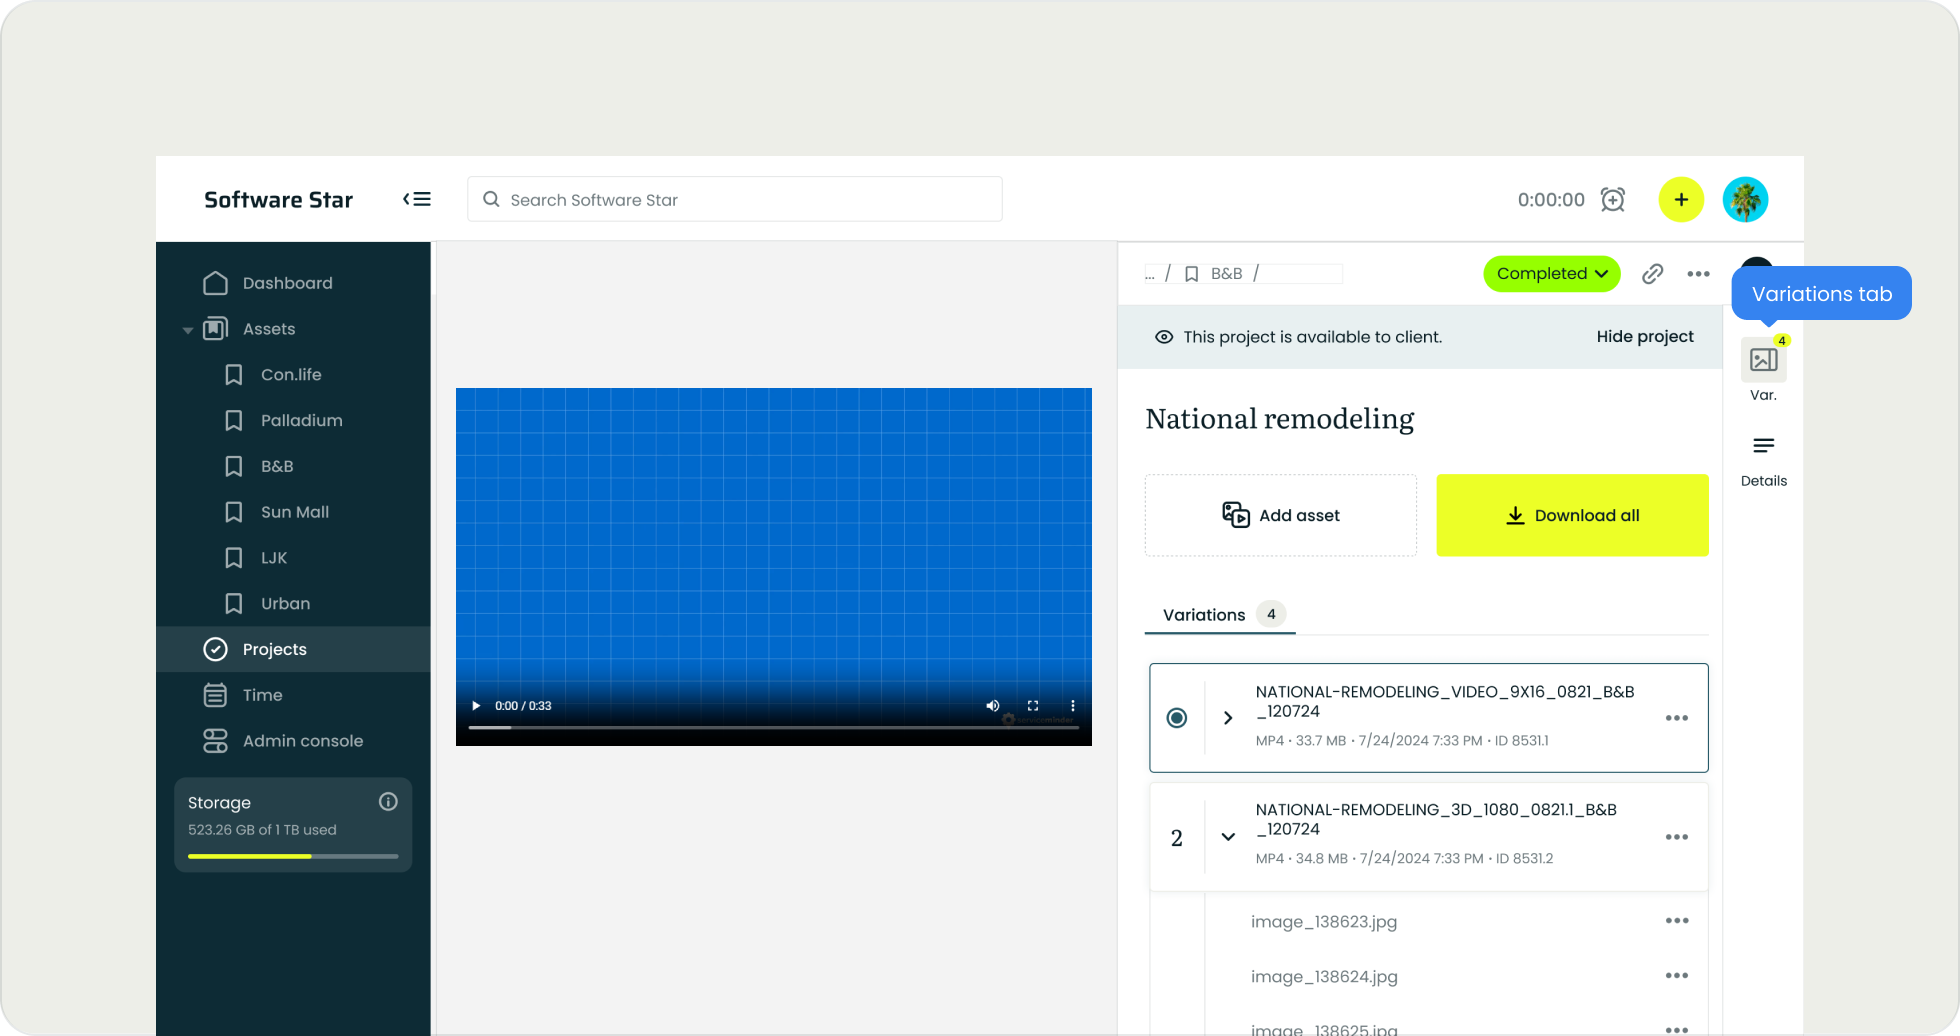
3. Mange file variations
Project details > 'Variations'
❕ Once at least 1 asset is uploaded, the 'Variations' tab will appear.
The first variation will be designated as the 'Original file' by default. You can reorder the list by using drag and drop functionality.
Each variation, including original file, may contain source files or their links. To attach source file expand row and click on 'Attach source file'.
To preview each variation, simply click on its tile.
4. Mange project visibility for client.
Project details > 'Make visible' / 'Hide project'
❕ After uploading files, the project becomes visible to the client by default.
It means that project is published under the 'Assets' folder. To unpublish project, click on 'Hide project'.

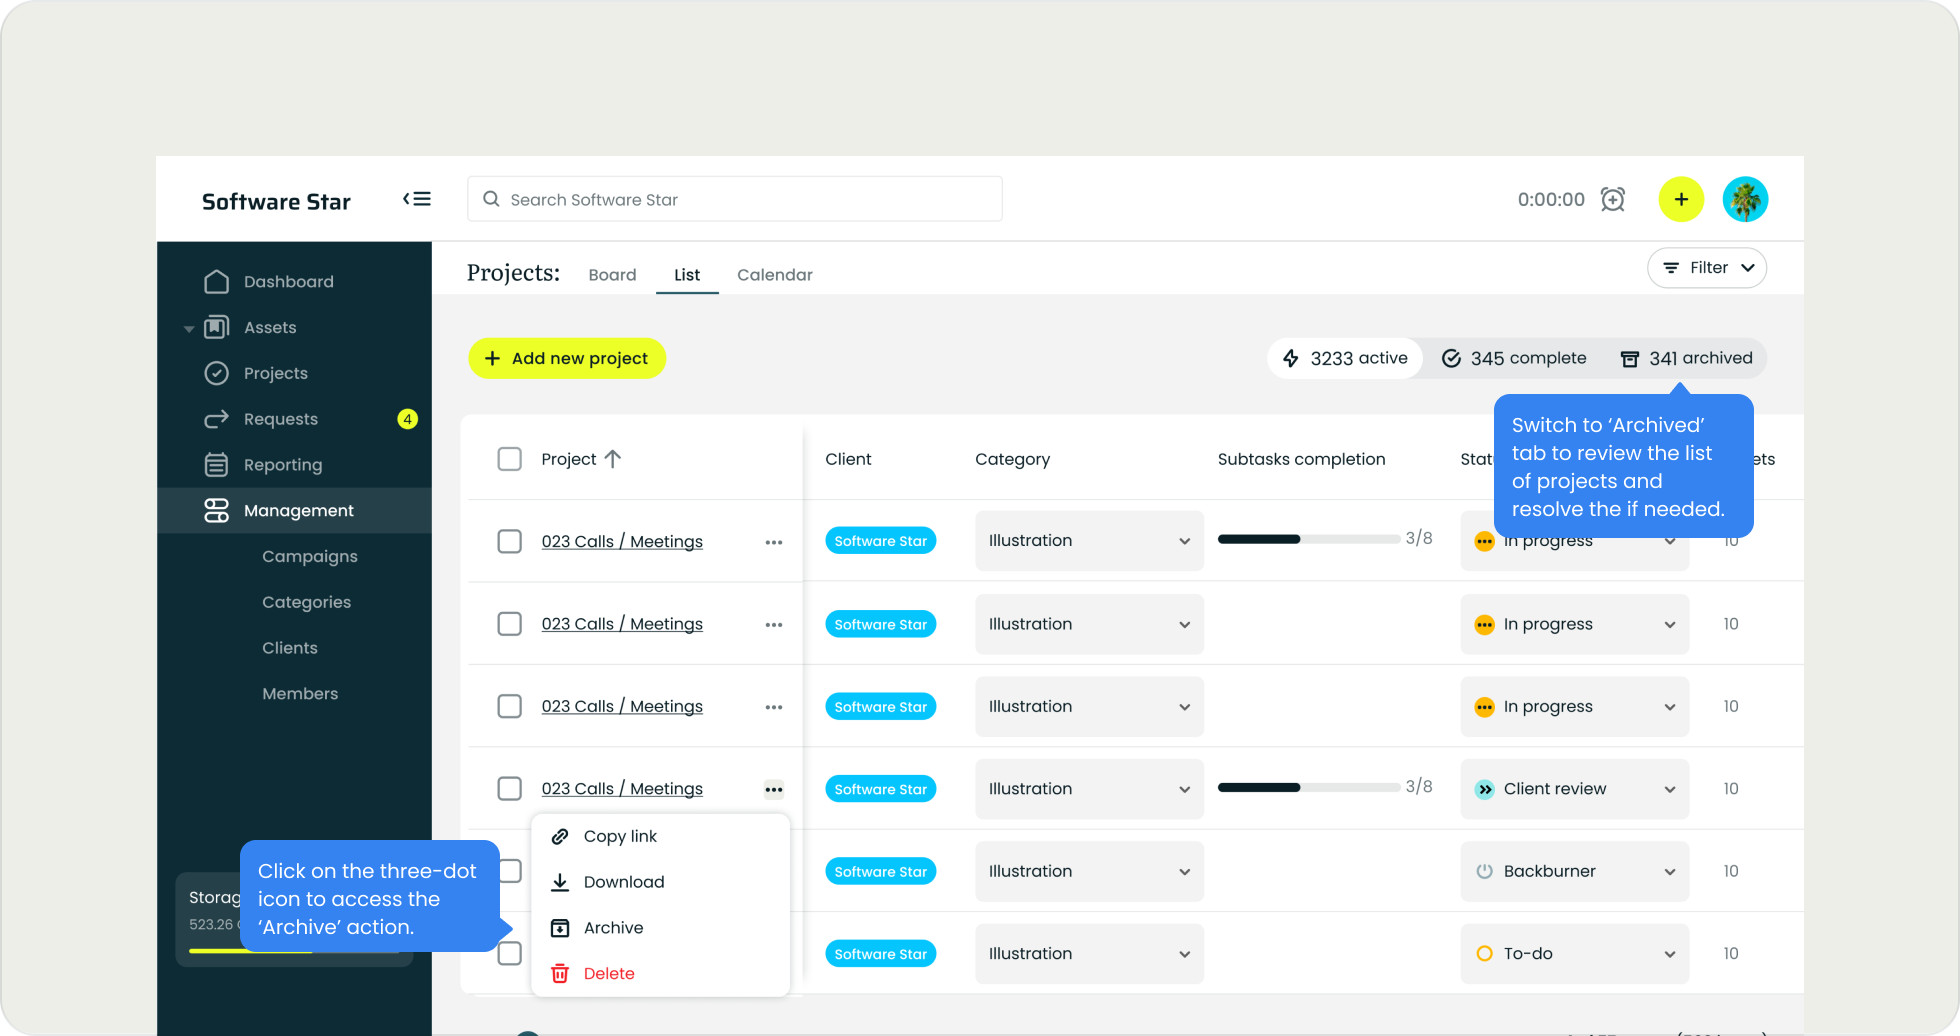
5. Project archiving.
Projects > List view > 'Archive'
There are several ways to archive a project. The 'Archive' option can be accessed under the three-dot icon, which is available on the project thumbnail (when hovering), in the project details, or in the project list next to the project name.
6. Showcase top projects for the client with a custom banner. (Upcoming)
Assets > Select client > All projects
Showcase recent top projects with a custom banner. The client won't be able to upload or edit it.
Click on placeholder to upload image. Recommended dimensions 3200 x 410px.
Once the image is uploaded, you can hover over the banner to access the 'Replace image' and 'Remove' options.

Creative operations, made simple
Request free trial