Help center / For agencies / Step 2
Adding new project
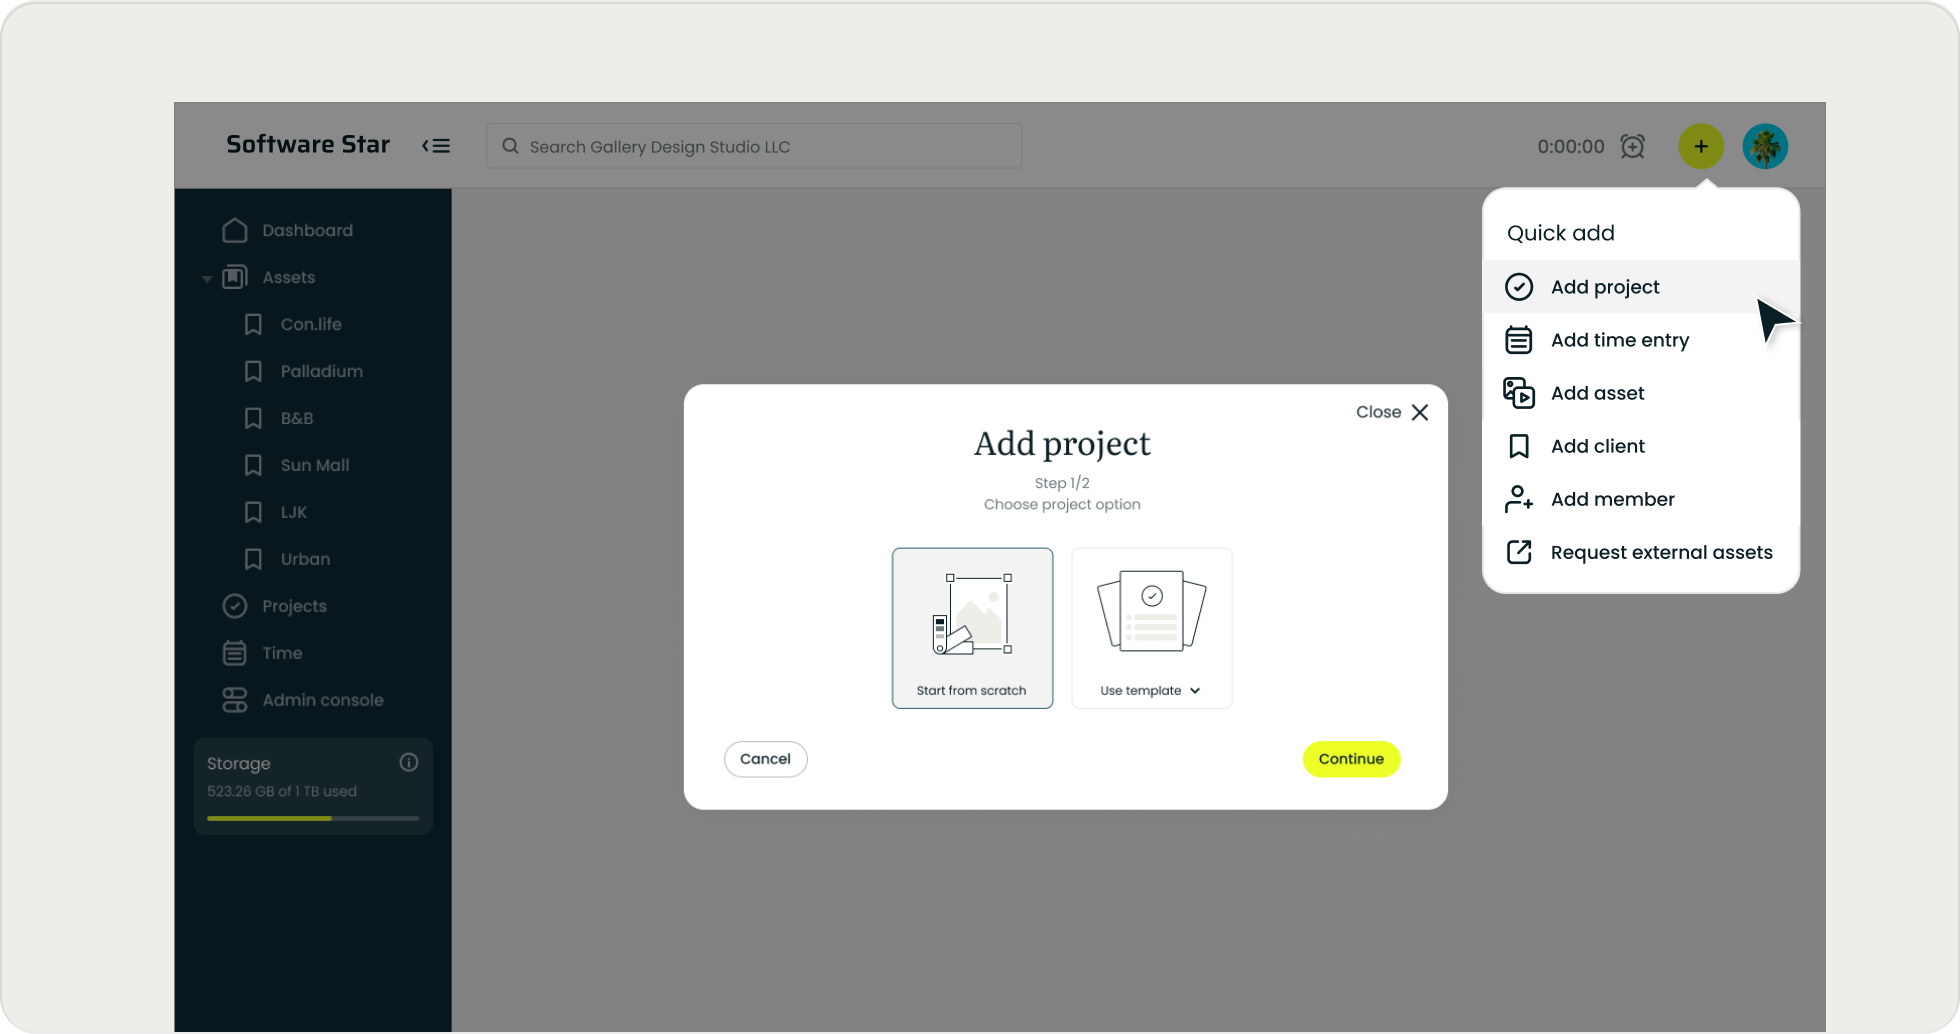
1. Add new project
Click on ‘+’ icon > ‘Add project’
or
‘Projects’ > ‘Add project’
Start from scratch if you want to create a project without subtasks, or choose one of the templates with a predefined list of subtasks and their assignees. You can change assignee and provide start and due dates later.
Every project must be associated with a designated client folder, where final assets will be published if applicable.
❕ The project will not be visible to the client and will not be present in their folder until it is moved to the ‘Complete’ status.
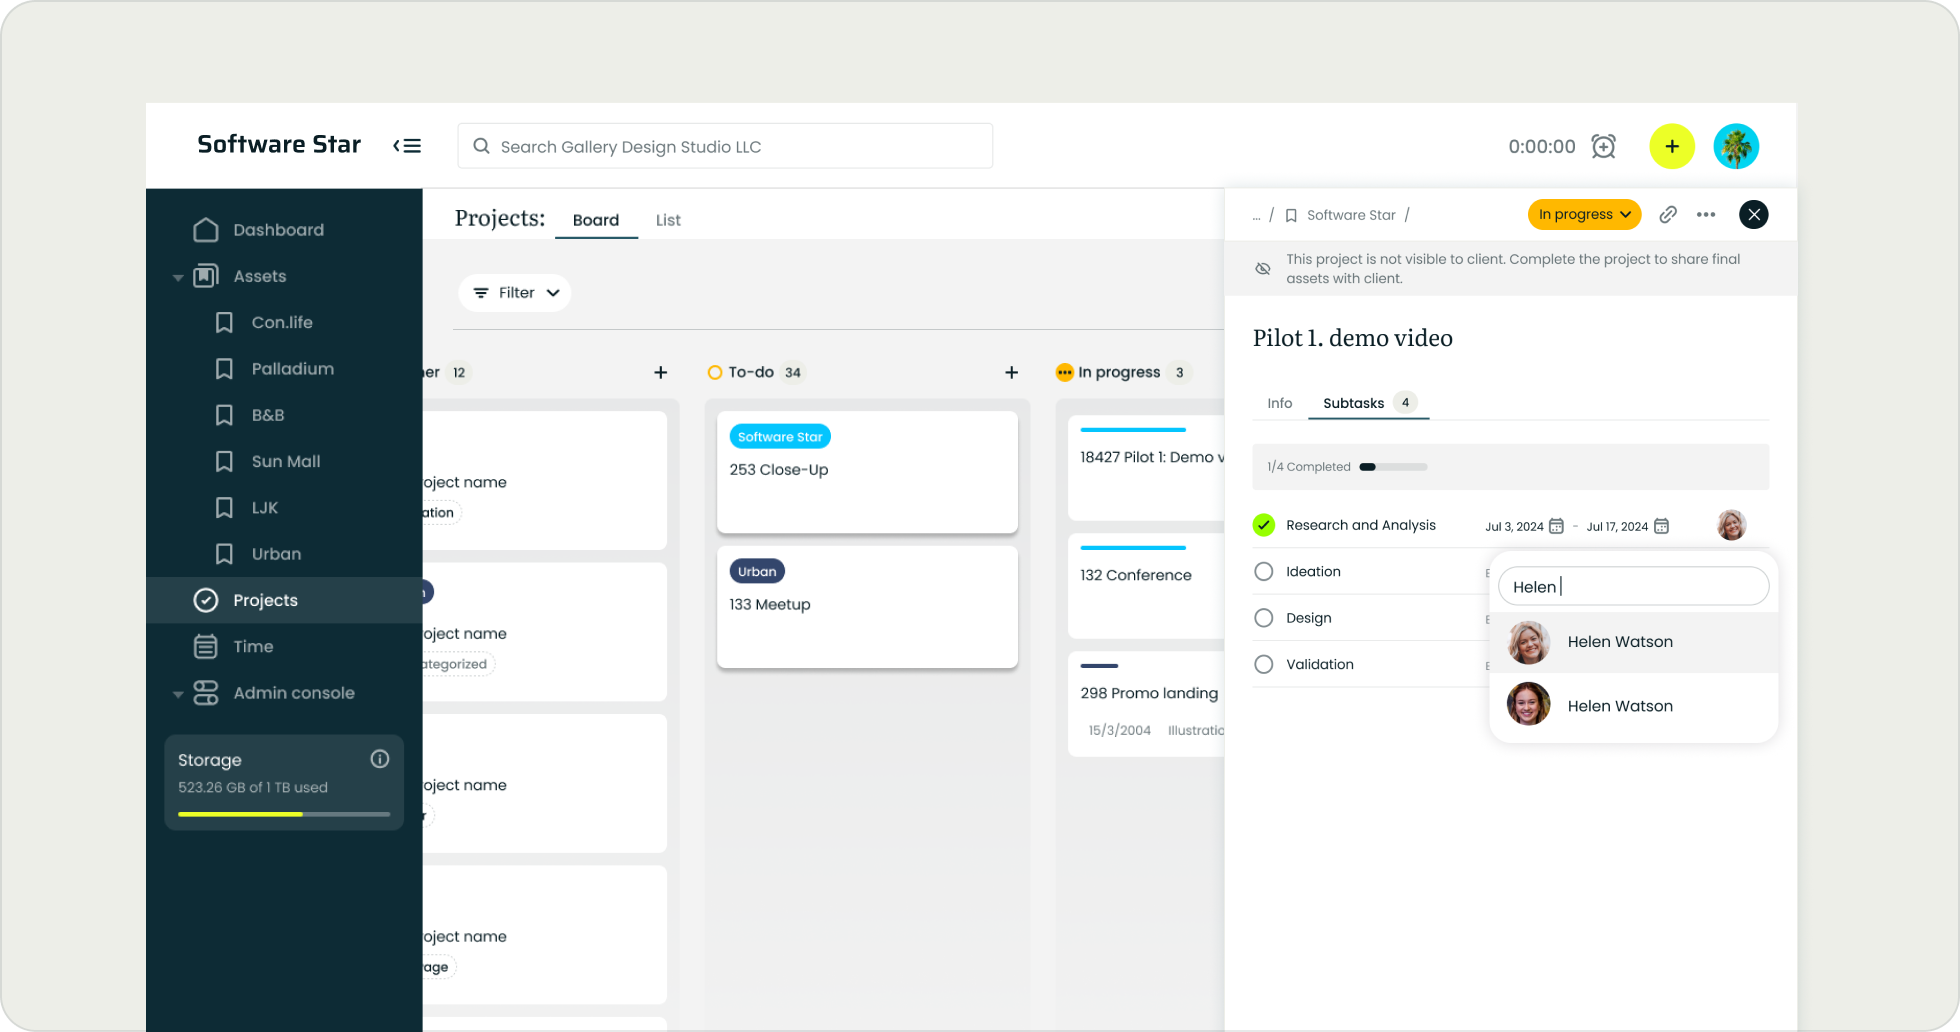
2. Adjust project info
‘Projects’ > Click on project
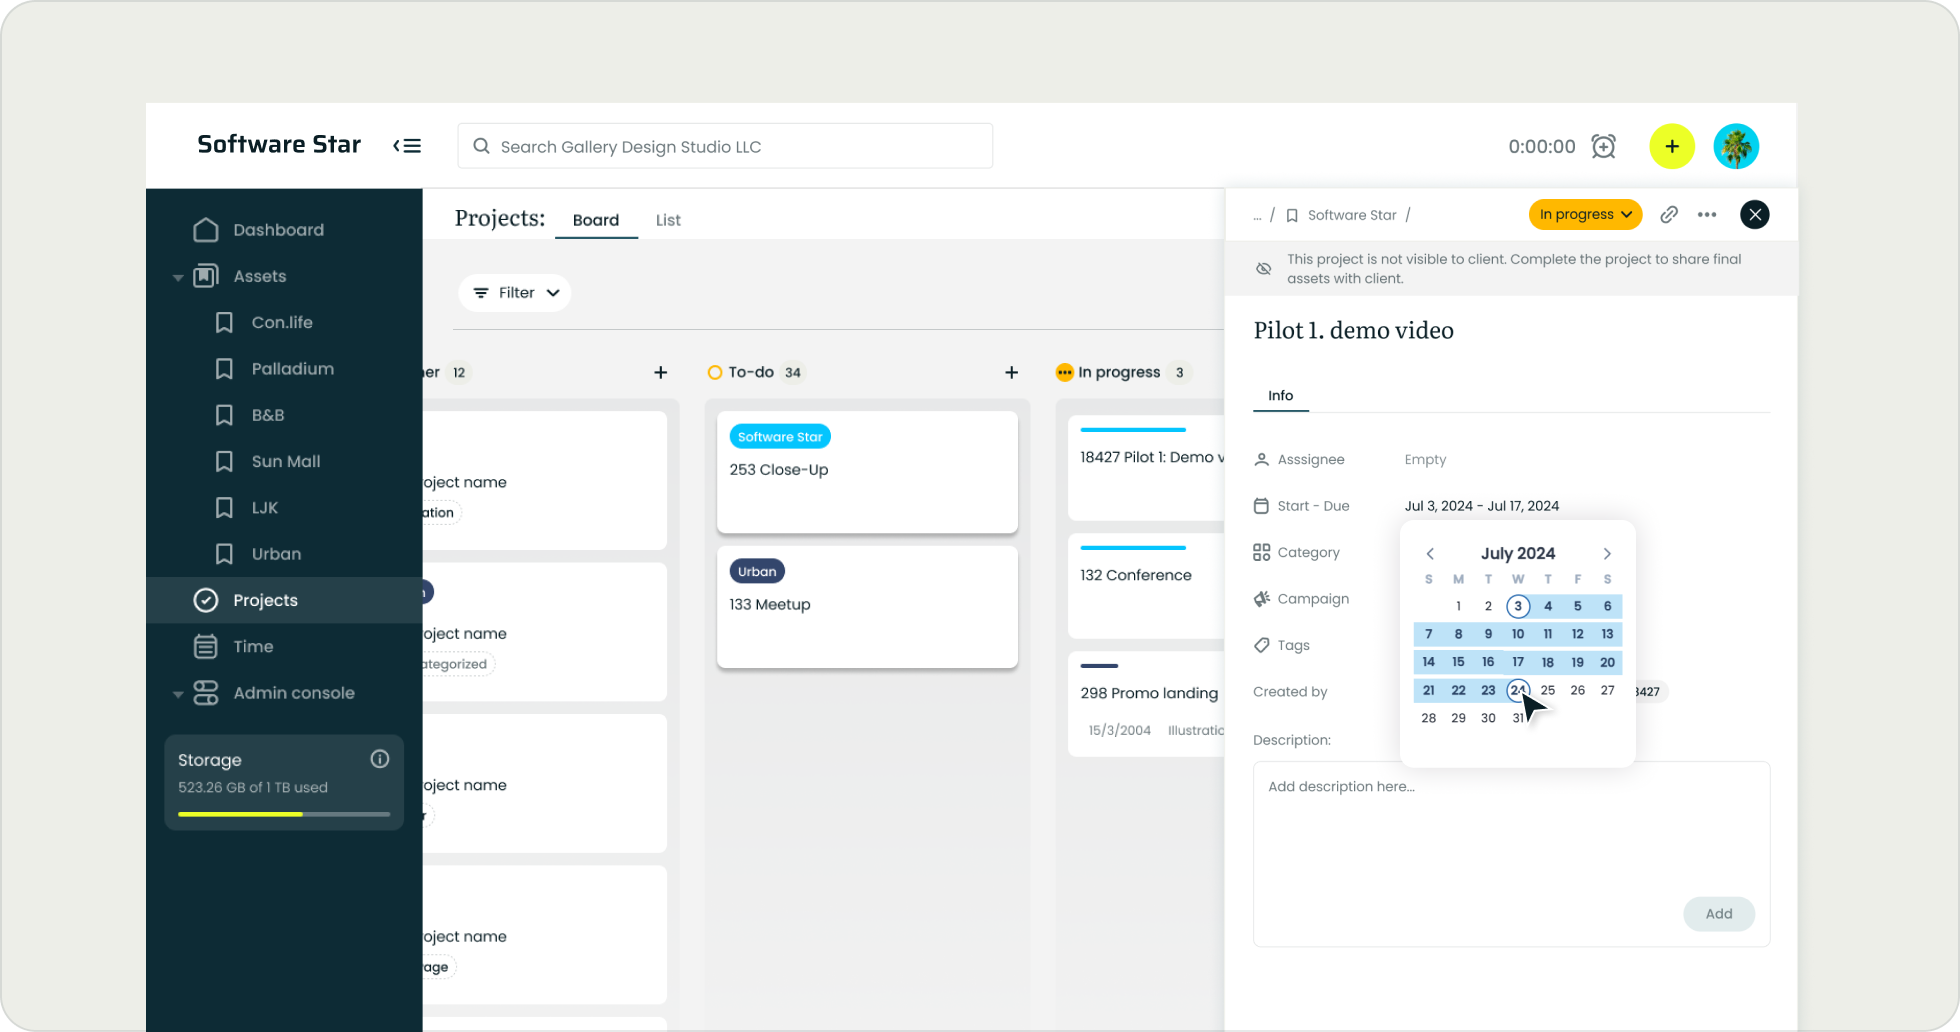
❕ If the project contains subtasks, the assignee should be applied to each subtask separately.
Creative operations, made simple
Request free trial © 2023 eShelf.io. All rights reserved | Privacy Policy | Terms of Service
