Help center / For agencies / Step 1
Adding new client
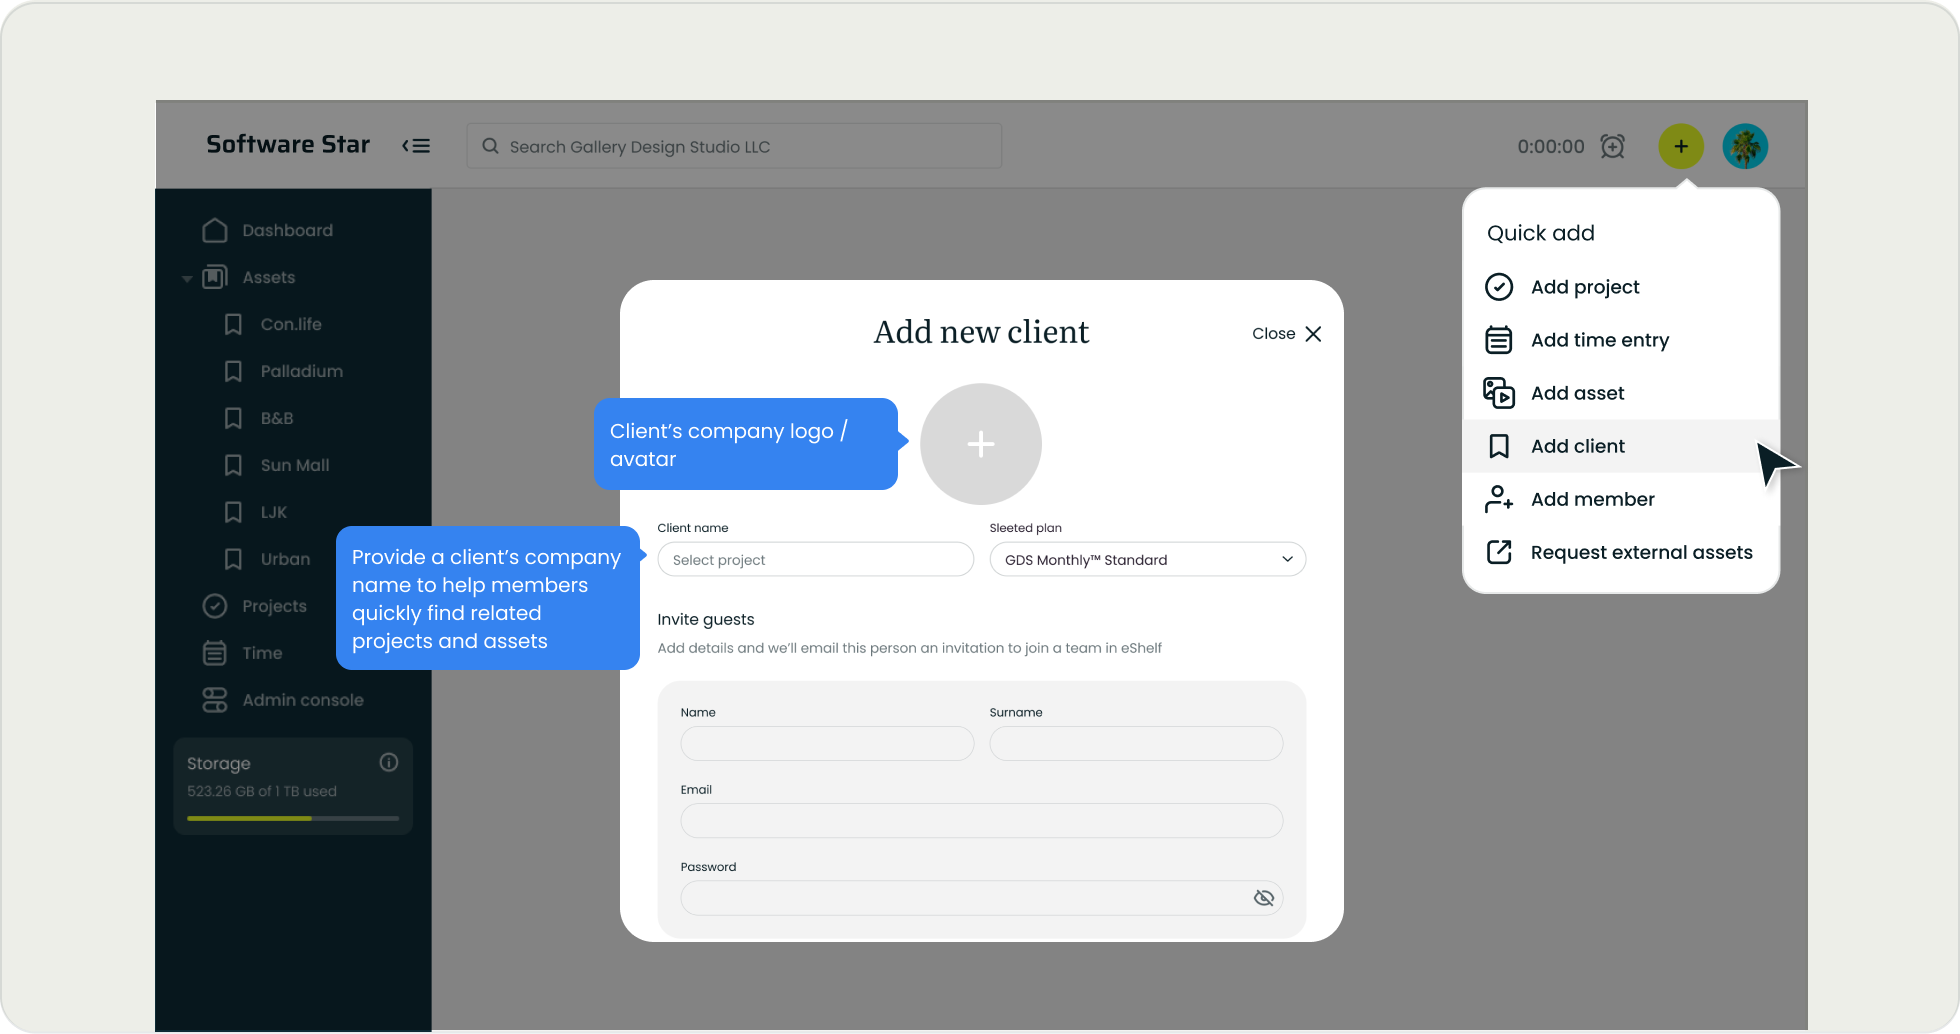
1. Add new ‘Client’ folder and invite user with ‘Guest’ permission
Click on ‘+’ icon > ‘Add client’
or
‘Admin console’ > ‘Clients’ > ‘Add client’
When adding a new client, a dedicated folder is created to gather all final assets. This folder will be visible under 'Assets' in the sidebar menu. Each folder is linked to a member with a 'Guest' role, typically the owner of the company you are collaborating with. Furthermore, you can invite additional members with the 'Guest' role by selecting the 'Add member' option (using the '+' icon).
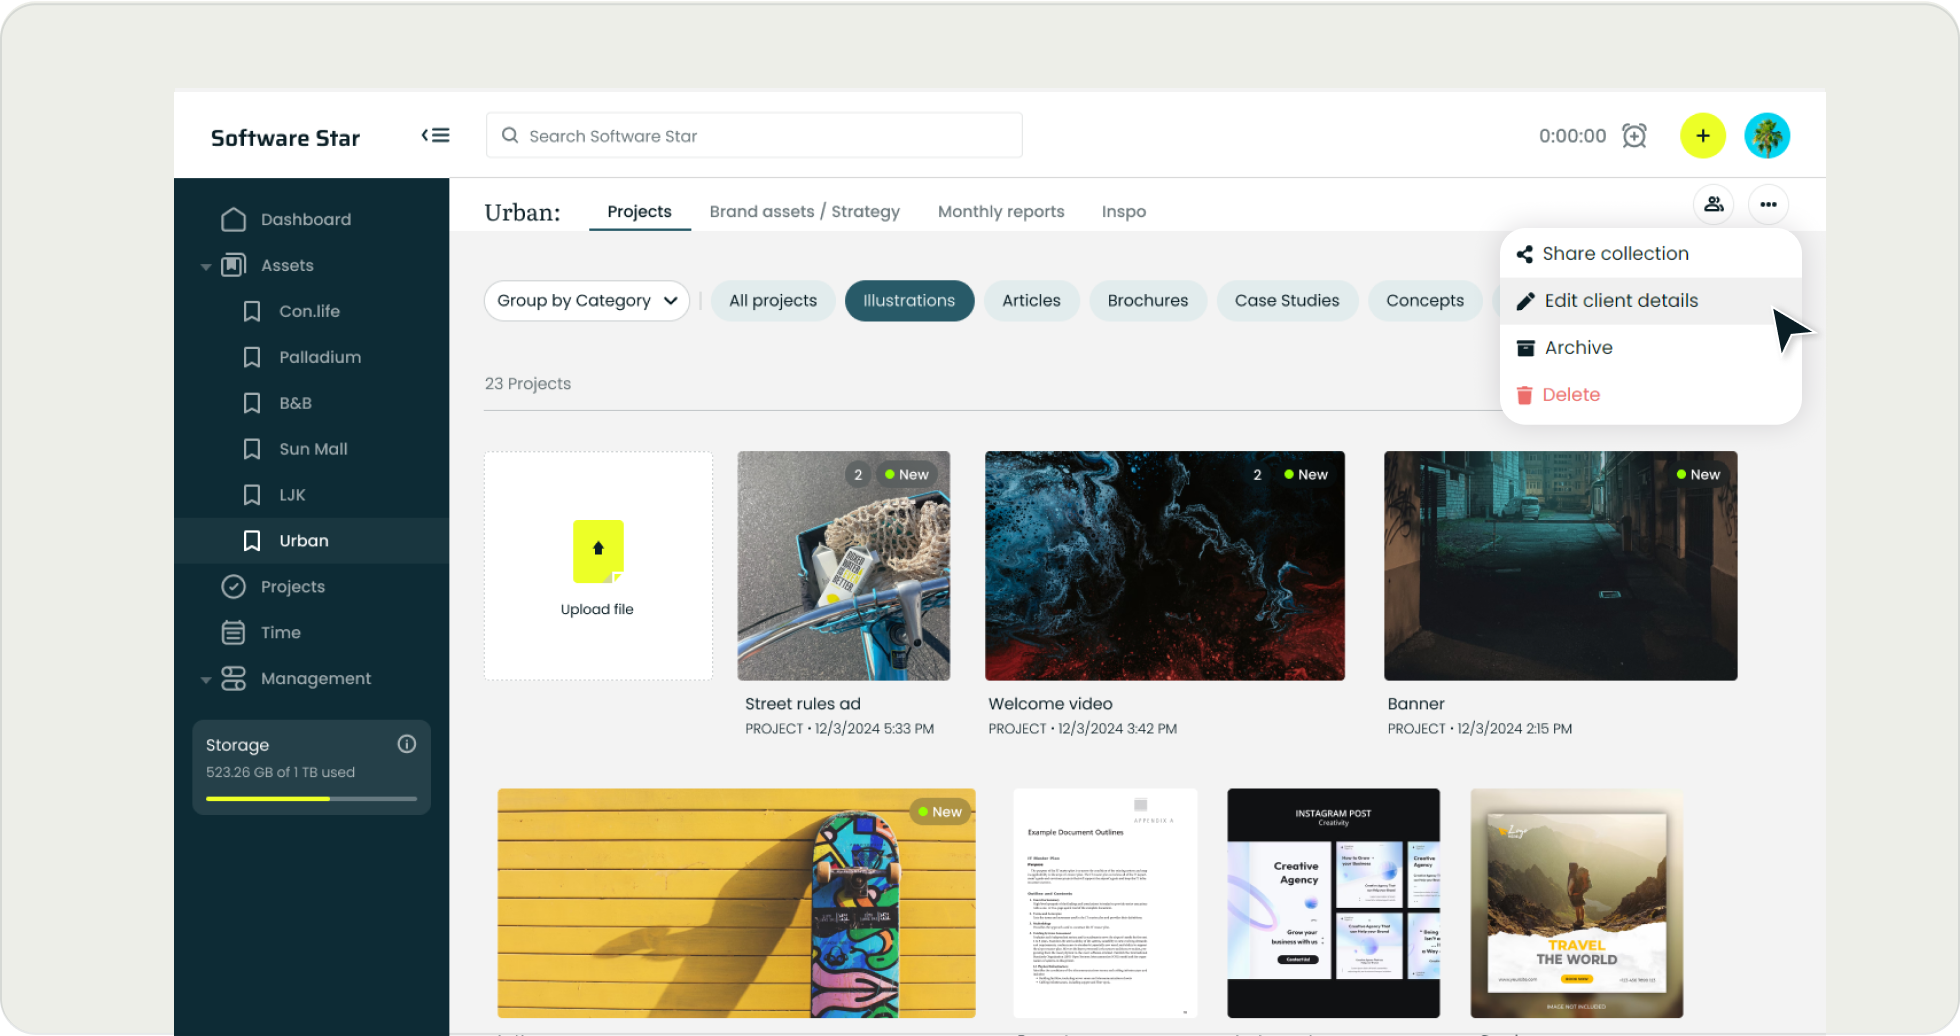
2. Customize client’s dashboard
Go to client folder > Click on ‘ ’ > ‘Edit client details’
or
‘Admin console’ > ‘Clients’ > Click on ‘ ’ > ‘Edit client details’
Upload a custom banner that reflects the customer's brand. By default, the banner will adopt the selected client's color.

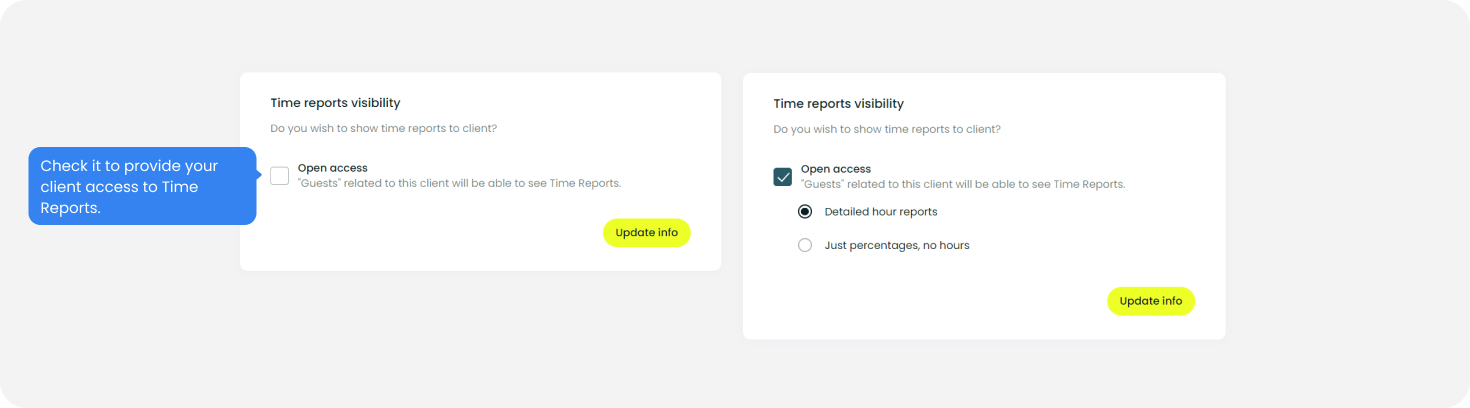
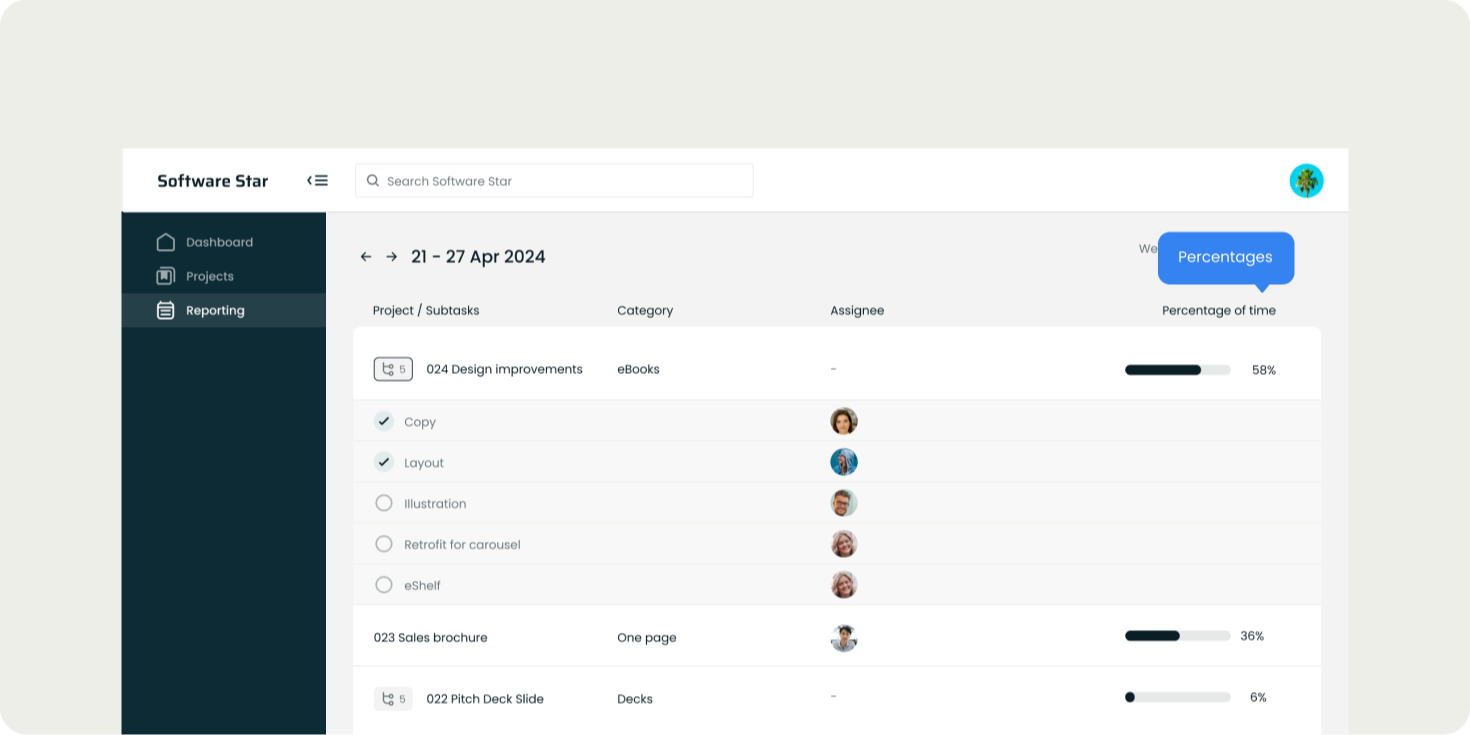
3. Adjust the visibility of time reports.
Go to client folder > Click on ‘ ’ > ‘Edit client details’
or
‘Admin console’ > ‘Clients’ > Click on ‘ ’ > ‘Edit client details’
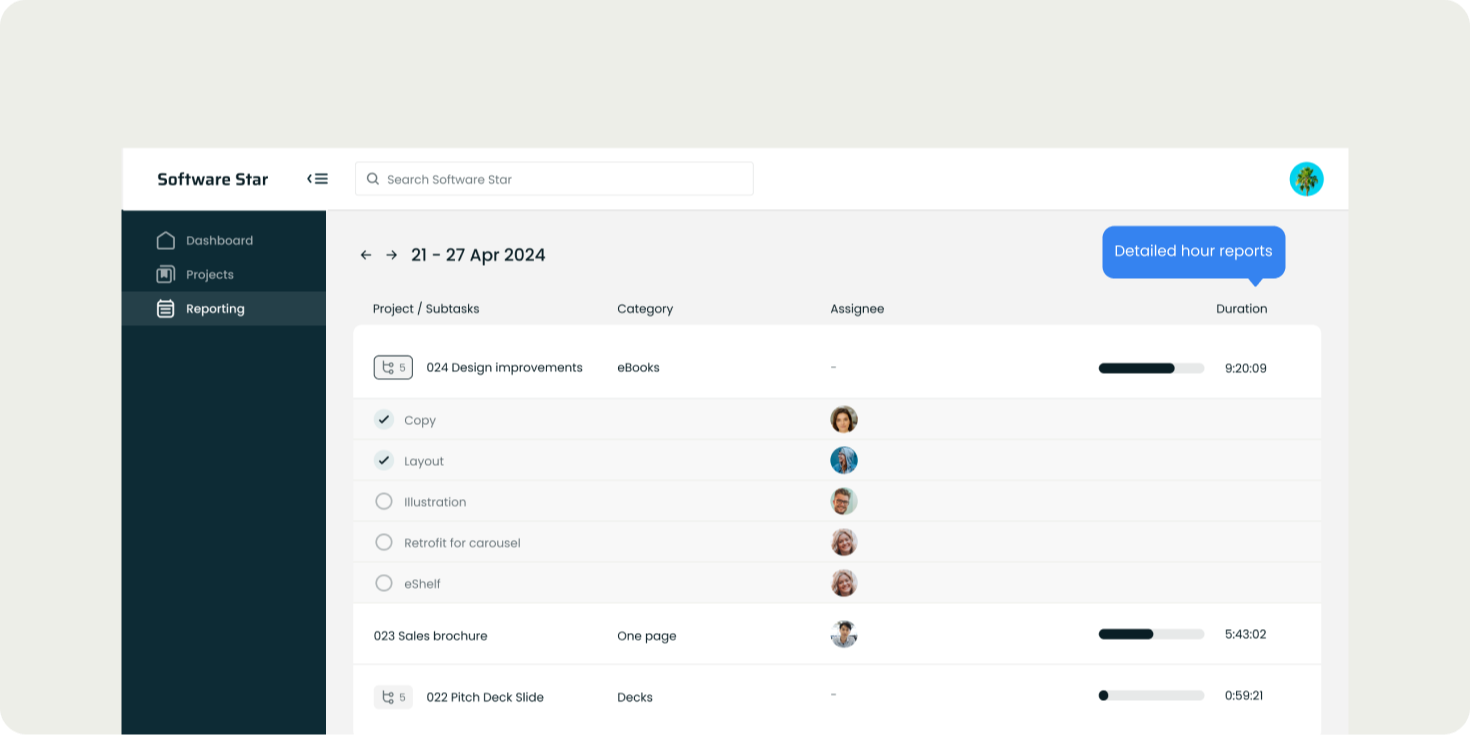
For projects involving multiple large tasks, we recommend using the 'Detailed' report option. This provides a comprehensive breakdown of hours spent on each project, ensuring detailed tracking and analysis.
The hours spent per project will be calculated based on the 'Time Tracker' reports submitted by each participant involved in the project (check 'Adding time entry' for more details).
4. Provide access to new client assets
‘Admin console’ > ‘Members’
In 'Access' column select the folders you want to grant access to. 'Admins' can have access to all clients assets.
Creative operations, made simple
Request free trial